Priority Sets |
|

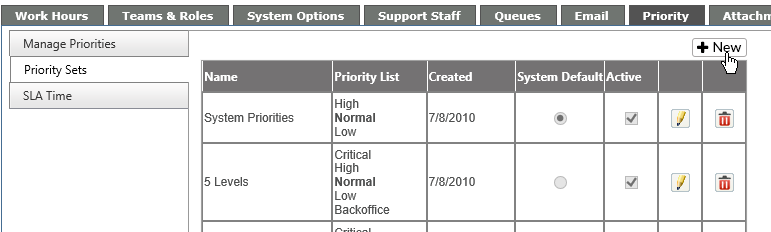
Revelation helpdesk ships with a single priority set - System Priorities - which is set at High/Normal/Low. Additional Priority sets can be created using these levels or by creating new ones. Each priority set will have a minimum of 3 priorities; a maximum of 9 can be set.
Create a Priority Set
Click on the Priority Sets tab and select the New button at the top of the page:
Create a name for the Priority Set and ensure Active is checked:
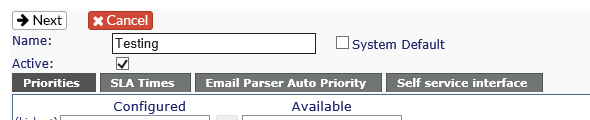
If this is to be the System Default, ensure the check box on the right is ticked.
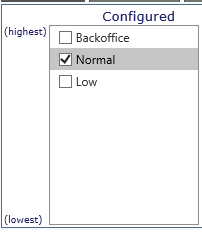
Select the priorities from the Available Column, or click on Add New at the top of the Available column to add a new one. You can add up to nine, but must have a minimum of three:
If you want to rearrange the priorities, simply drag it up or down to the appropriate level.

Check off one of the Configured Priorities to be the default, and click on Next at the top left of the screen.
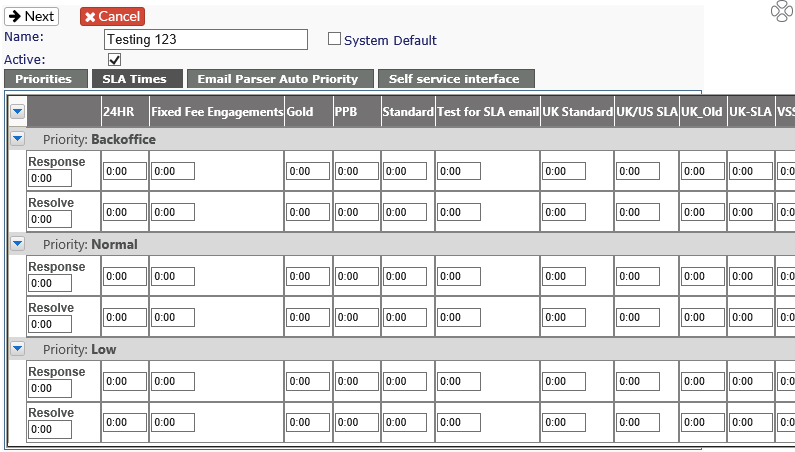
Set the Respond and Resolve times based on the Service Level Management set up in your system. By putting in a time in the first column, it fills in across the SLAs. If a particular SLA requires a different Response/Resolve time, each column can be customized:
Click on Next to move to the Email Parser Auto Priority tab. (This will only be visible if you have the Email Parser module activated.) Select which Priority will be logged if the email is sent with High/Normal/Low importance from the client:
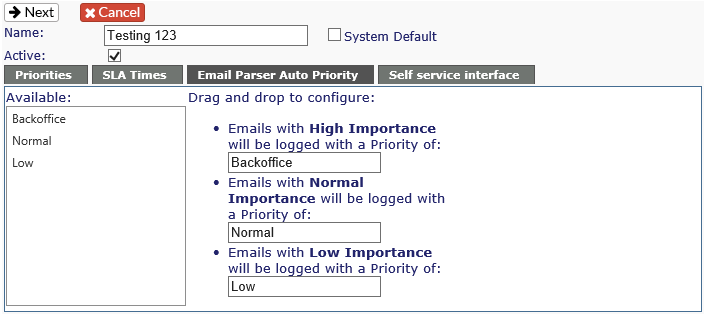
NOTE:You will only be able to set three priorities for the email parser.
Click on Next to move to the Self service interface tab. (This will only be visible if you have the Self-Service module active.) Select which priority will be used when a ticket is logged through the Self-Service interface:
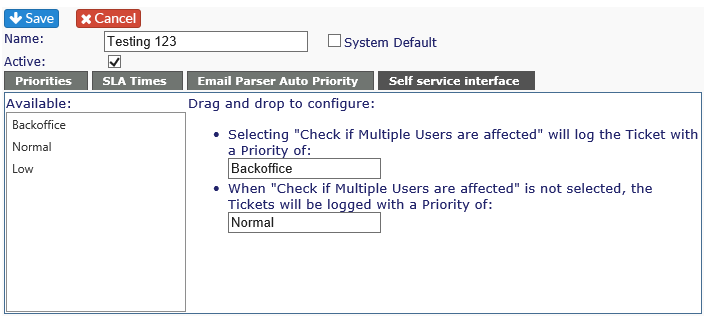
NOTE:You will only be able to set two priorities for the Self service interface.
When complete, click Save at the top left and the new Priority Set will be added to the list. If you wish to cancel the changes at any time, click on the Cancel icon.
Edit a Priority Set
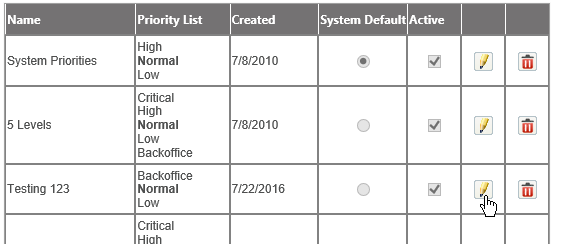
Click on the Priority Sets tab and then click on the pencil icon next to the Priority Set you wish to edit.
Select the tab you wish to edit, make your changes and click the Save icon when done. If you don't wish to keep your changes, click on the Cancel icon.
Delete a Priority Set
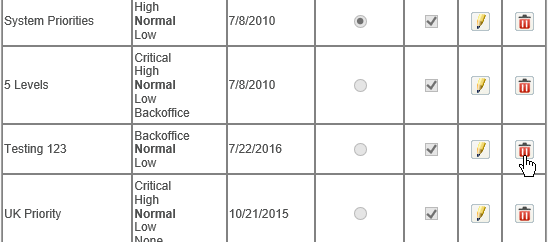
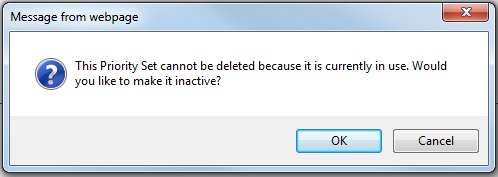
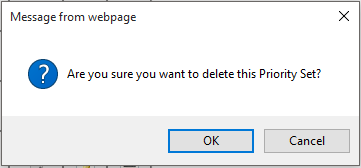
To delete a priority set, click on the red trash can to the right of the set.
If the set is in use, you'll get the following message:
If the set is inactive or not in use, you will get the following message:
 .
.
Click OK to complete the action, or Cancel to stop the action.


