Sending Email |
|

Users have the ability to create an email entirely within Revelation. It will automatically copy that email into an Action upon sending. To ensure this is working, Administrators must enable "Email to Ticket Action Note" under Email Settings.
To send an email
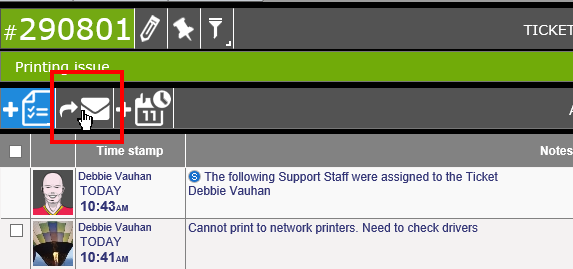
Click on the envelope icon in the Action Note tool bar. This will open a window so an email can be created.
The email field will open as though it is a regular Action Note:
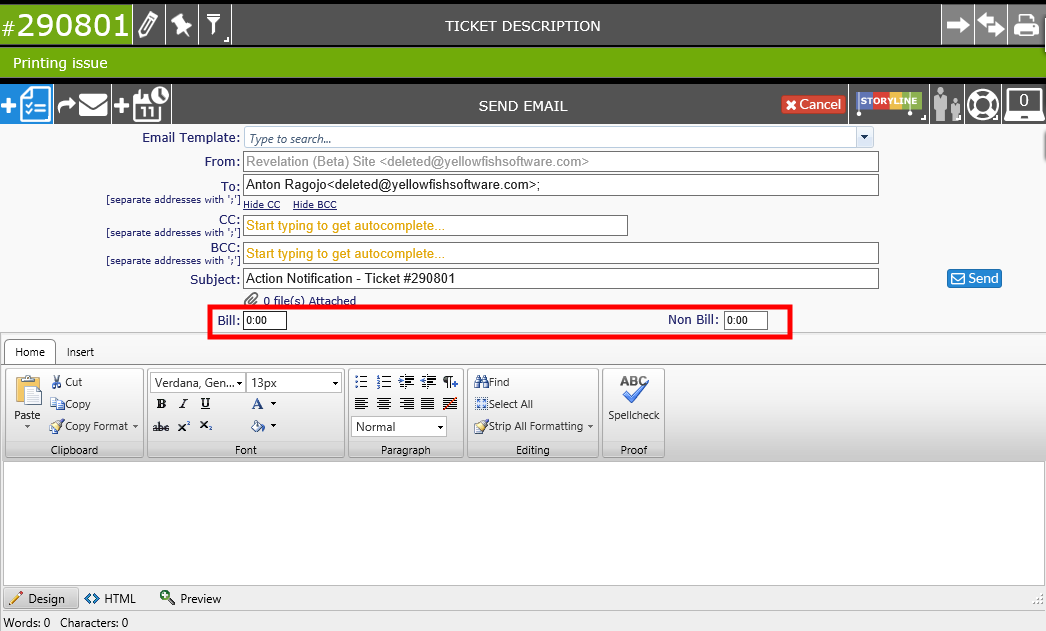
The To field auto-populates with the name and email address of the End User assigned to the ticket. However, if needed, as you type in an email address, you will receive suggestions for an auto-completion of the address based on your system's Active Directory or Revelation contact information. Select the one you need to continue adding the information and notes for the email.
The From field sends by the System address set in your copy of Revelation helpdesk.
You will be able to add in your billable and/or non-billable time for the email directly in the form. (Highlighted area) If you forget to add your time in the form, you can edit the ticket once the email is sent to add in time.
You will receive a notification if the email was successfully sent. When completed, the text will be included as part of the ticket as a note. Any Action Note created from an email will contain an icon showing it was sent via email.

If you don't want to continue with the email, click on the Cancel button.
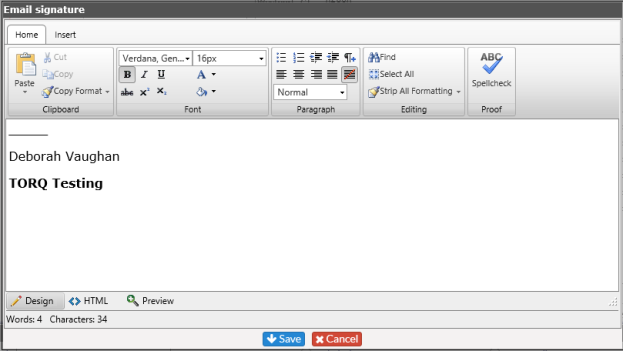
Set your Email Signature
If you have a standardized email signature requirement for your company, it can be added so any email sent via an Action Note will include your signature.
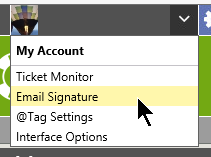
Simply click on the drop down at the top of the screen and select Email Signature.
Put in your signature, adjusting the font and size as needed, and hit Save. The signature will be included in any email sent from an Action Note in Revelation.